|
|
|
| The Process | |
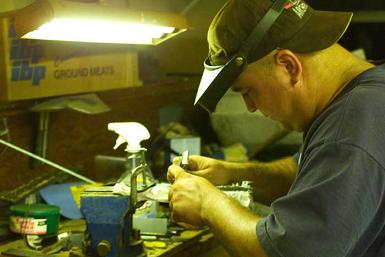
| The Process I use my gas forge (used to be coal)to forge close to shape, leaving the blade edge thick to prevent carbon loss. My wife is the best lady on the planet, but she wouldn't come near my coal forge, I've gotten her to take pictures for me now that I have my gas forge completed. I clean up the profile, tang and start a plunge cut using a worn 36x 3M Regal belt on my Burr King 960. (Off on a tangent now) I just got this baby after using a 4x36 grinder for the last 2 years it's unbelievable!!! WOOO HOOOOO (sorry, but it's so cool!) Use a worn 60x to grind the preliminary bevels, then clean up with a newer 60x and 120x. After cleanup on the Burr King (my baby, sorry Mrs. Leavitt) it's off to heat treat in the flames of the forge. Heat treating is really where the "magic" of any steel, but especially a forged blade happens. First step is a normalizing cyle to relieve stress, I've tried a multi cycle normalizing, but feel that I was losing a little edge holding (carbon loss perhaps?). I slowly bring the blade up to nonmagnetic and then quench about 1/2 of the blade. Lately, I've been getting good results with canola oil, it smells nicer than the ATF I was using and it seems to give me a better cutting blade. I prefer the edge quench over a soft back draw because I get to wondering what's going on where I can't see the colors. I only fully harden kitchen knives. I get asked, "why don't you do multiple heat treat cycles?" My tests and all my research don't show any improvement in simple carbon steels with a multi cycle heat treat. I clean the blade up (to see colors) then into the tempering oven for 3 cycles to ensure martensite conversion. I'm seriously thinking about adding a cryo cycle but have to assemble the materials. Finish up on the grinder by starting back with a used 60x to clean scale, new 60x to refine the grinds then up through a 400x before moving on to the satin finishing. I hand rub using a micarta or leather and micarta block. I start back with a 400x wet/dry using glass cleaner for a lube then on through to 1000x for the EDC or 2000x for the showier pieces. I really like a hand rubbed finish, it's a little more work but I think that straight sanding lines really show that the blade was crafted by someone who cares. Handles are either wood or a phenolic. After epoxying and pinning (or Corby bolts) I'll "block" the handle with a sharp 60x to prevent the wood from burning. I remove the platen so I can slack belt up through a 15u Micron belt. Then a stiff piece of leather backs the sandpaper and I'll clean the scratches up. A nice carnuba wax finish or tung oil depending on the wood. Don't mistake this type of carnuba with what you're using on your car. Pure carnuba is so hard that you have to run it on a buffing wheel then use the buffing wheel to burn it into the wood grain. Done properly it leaves a wonderful glossy finish that is low maintenance, if it dulls you just rub it with a towel to bring the shine back. Sheath making, sigh. I make a nice fitted leather pouch sheath for each blade. I make the sheaths because the sheaths I can afford to include aren't really up to what I think should be with one of my knives (well your knife.) I use leather instead of kydex or concealex because you can't strop your knife on that plastic stuff. I may start doing kydex sheaths if I get enough requests for it. Thanks for taking the time to read this. If I do something differently than how you think I should or some other guy you know does it, feel free to tell me. It's a learning process and I'm always learning. Some steps are holdovers from using a coal forge and that ole 4"x36" grinder. I'm learning something new everyday. I hope this gives you a little insight into how I craft your knife. You're more than welcome to stop by and see for yourself or to try your hand at it. |
|
|
|
|
| |
 |
|
|
|
|
|
 |
|
|
|
| |
|
|
|
|
| |
|
|
|
|
|
|
|